• Skip to secondary menu
  • Skip to main content
  • Skip to primary sidebar

Cake Ideas 101

Easy Cake Decorating Ideas

Menu   ≡ ╳
  • Home
  • About Us
  • Books & Videos
  • Contact Us
  • Hobbies
  • Photos
  • Store

Cake Ideas – It All Starts With The Cake

Decorated cakes start with a good foundation of the cake itself. Here are a few cake ideas that we would like to share.


  • Always make sure you have extra cake mixes on hand for those unexpected last minute orders. We live 90 miles from the nearest Wal-Mart, so we make sure we have an inventory on hand because they are cheaper from there than my local grocery. We keep chocolate and white mixes in stock just because they are the most requested flavors. If someone wants any other flavor, we just purchase it locally, unless we're going to Wal-Mart before it's needed.
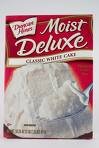
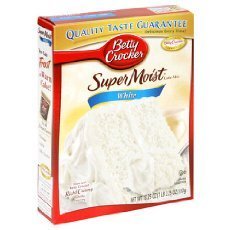
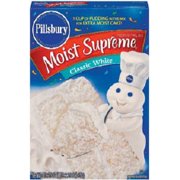
  • What brand of mix should you use? We would say that totally depends on which one you prefer or have the best luck with. We personally use Duncan Hines, but we know other decorators that swear by Betty Crocker or Pillsbury. It is just a personal preference, so just experiment till you find the one you like the best.
  • A little tip for using Duncan Hines white cake mixes – add an extra tablespoon of oil to the batter to make it a little more moist. Chocolate mixes require more oil anyway, and we have found this extra tablespoon helps the white mix.
  • Make sure to follow the mixing directions on the box for the time required to beat. Not only is this getting the mix totally blended, but it adds air to the batter which makes it raise better. That's why the instructions say to bake immediately after pouring the batter in the pan.
  • We don't know about other brands of mixes, but Duncan Hines has 5 cups of batter when it is mixed up. You might wonder how we know that or why we would care to know. We have done several wedding cakes and some of the pans require more than one mix to fill the pan.  So by having to measure it out to get what was required for each layer, we decided to remember that little tidbit for future reference. So now you won't have to dip and measure 😉
  • One easy way to grease your pan is to use waxed paper to line the bottom and sides instead of smearing shortening and flour. Of course, this will not work for character pans because they do not have a smooth surface. There is more about this in our entry entitled "Cake Ideas-The First Steps."
  • Since cakes tend to raise more in the middle, be sure to spread the batter well into the corners and along the sides. It may even be a little sunken in in the middle when you put it in the oven, but it will raise and be more level with the rest of the cake.
  • Don't get too far away from the cake while it is baking and make sure to set a timer and check the cake frequently when the time is about up. It doesn't take long when it's at that point to get overbaked and start drying out. You will be able to see this because not only will it get too brown, but it will start pulling in from the edges of the pan.
  • Put the cake up on a wire rack to cool rather than leave it on a counter top or on potholders. This lets air circulate around the entire cake so it will cool faster. Once it is cooled, dump it out on the waxed board or plate and remove the waxed paper if frosting soon. If frosting the next morning, just leave the waxed paper on till then to help seal in the moisture. After removing the paper, gently brush the crumbs off the top and sides they don't get picked up by the frosting.
  • Now is the time to do any leveling of the cake if need for a layer cake. We personally invested in a serrated blade slicer rather than the one with a thin wire. We couldn't believe how much easier it worked!

Now that the baking is done, you should have a good foundation to start decorating cakes. Remember, you not only want your cake to look good, but you want it to taste delicious. You want to know that when people are ready to sink their teeth into that masterpiece of yours that it is not only pretty, but one that they will rant and rave about. It is important when you have decorated cakes that you have a good product to start with – before the frosting. That is why it is essential to make sure the cake is good, not only in taste but also quality. Yes, frosting can cover up a multitude of mistakes, but when it comes down to putting that fork full in your mouth, you want to know it is going to be absolutely delicious. Yuummmmmm! click here to visit my store for ebooks with cake recipes.

Be sure to sign up for our FREE eBook “Cake Decorating: How To Go From Beginner To Expert” by subscribing to our FREE Monthly Bulletin at the top of the right side about decorating cakes, and to receive contest notifications, recipes, and cake ideas.

Cake Ideas – The First Steps


When getting ready to make and decorate a cake, there is some thought and planning that needs to go in to it first. What if you get in the middle of it and realize you don't have all the ingredients? What if you have something else planned the day the cake is needed? Below is a list of things we check, not only with the customer, but mostly with ourselves.

  1. One of the first things we do is to check our calendar to make sure of the day the cake is needed. If we have something else going on that day, we can make it the day ahead and put it in the refrigerator. Much less stress doing this than doing the cake on a busy day with other plans. Make sure to double check the date with the customer. We once made a cake a week early because she said she needed it on Wednesday. Problem was, she needed it the NEXT Wednesday. Thank goodness for freezers!
  2. Next, we check to make sure we have all our ingredients for cake and frosting that we need: cake mix, eggs, oil, powdered sugar, shortening, and vanilla, almond and butter flavorings. We live about 90 miles from a Wal-Mart store, so we usually stock up on the listed ingredients in order to have them on hand when needed.
  3. We mix up the frosting at least a day in advance, if not four or five days. We mix up 4 batches of decorator icing at a time. It's just enough to fill a 5 quart ice cream bucket. We always seal the top of the frosting with a sheet of plastic wrap pressed down on top of the frosting to keep out any air that will cause the frosting to dry out, and then put the lid on the bucket and store it in the refrigerator. Having this step out of the way will let you concentrate on just baking and decorating cakes without having to stop and mix up frosting.
  4. The night before making the cake, we get the frosting out of the refrigerator so it will be room temperature and easier to spread.  We also get our pans out and get them ready. If we are using a 9 x 13 or 12 x 18 pan, (also any square or round pans) we line the pans with waxed paper. This saves having to grease and flour the pans. Once you turn the cake out of the pans, the waxed paper just peals off and is ready to frost. Or if you have to bake them the night before, just leave the waxed paper on till the next morning and it keeps the moisture sealed in.
  5. The night before you can also mix up any colors of frosting you will need. This will eliminate having to do it when you are in the middle of decorating cakes. We keep little yogurt containers with lids (some brands just have the foil top now) on hand just for mixing and storing colored frosting. We also use plastic wrap to seal over this frosting so it doesn't dry out.
  6. Line out what you will be using for decorations to make your cake a masterpiece. We use artificial flowers to add color and character to my cakes. We know that is cheating, but who needs all that extra sugar from eating those frosting flowers anyway? You can get cheap artificial flowers at the discount stores and just clip off the flower with just enough stem to stick down in the cake to make it pretty. Doing this the night before eliminates hunting them down when you're trying to put the finishing touches on the cake.
  7. Here is a checklist for a wedding cake planner you can download and print off: CLICK HERE .

Hopefully, there are some hints here that will help you with getting ready for making your masterpiece. These six steps are just some cake ideas we use when we're in the "preparation mode" to get ready to decorate cakes.

Be sure to sign up for our FREE eBook “Cake Decorating: How To Go From Beginner To Expert” by subscribing to our FREE Monthly Bulletin at the top of the right side about decorating cakes, and to receive contest notifications, recipes, and cake ideas.
  • « Go to Previous Page
  • Page 1
  • Interim pages omitted …
  • Page 10
  • Page 11
  • Page 12

Primary Sidebar

BEST ICING RECIPE

Get Your FREE Decorator Icing Recipe: Just fill in the form below and hear your customers rave!"

Let’s Share Cake Ideas on Pinterest!

Follow Me on Pinterest

Where our visitors are from

free counters

TODAY’S BIRTHDAYS!!

Today's Birthdays! See who's celebrating today!

CAKE IN THE NEWS!

Current Cake News Continually Updated from Thousands of Sources Around the Net!

55 Cake Decorating Classes to Choose From!

Online Cake Decorating Class

Sites of Interest

  • Amazing Products 101
  • Family Research 101
  • My Internet Business Space

Something You Might Be Interested In